Whether you’ve chosen to hire a professional or be your own artist, the wedding day presents a universal challenge. As tricky as doing your make-up can be on the regular, bridal expectation now demands, if not perfection, as little room for error as possible. For most of us, such a desire cannot be helped. With the anticipation of walking down the aisle comes the familiar weight of a romantic vision. You want to look exactly how you’ve imagined—perhaps you want to emulate classics like Audrey Hepburn or Grace Kelly with a strong brow and pink lip, or maybe you’re looking to glow like the Duchess of Sussex, freckles and all.
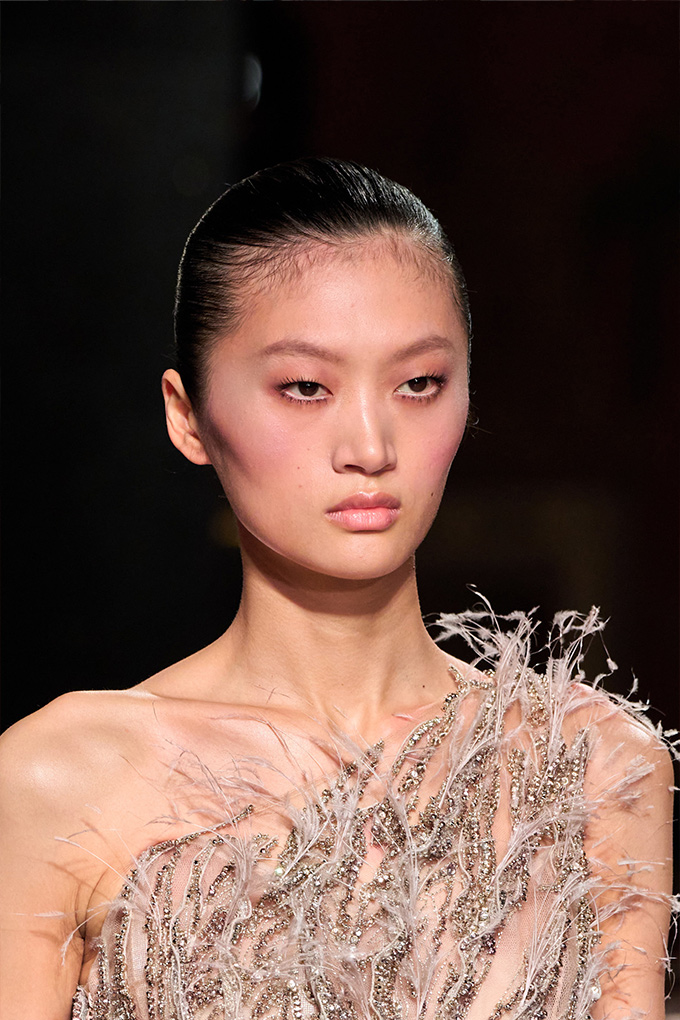
Of course, what bridal make-up looks like will vary, sometimes dramatically, for each bride. There are the Western conventions associated with bridal make-up: pinks, whites and pale neutrals have been preferred by brides who want to match the tones of their dress, or keep everything minimal. But if you’re a bride who hails from East Asia partaking in a more traditional wedding, you might be considering colours like red, incorporated in a bold lip or a heavier blush. So too might brides in a South Asian or Middle Eastern ceremony look to a defined eye, or bejewelled tones to pair with a more decorative dress.
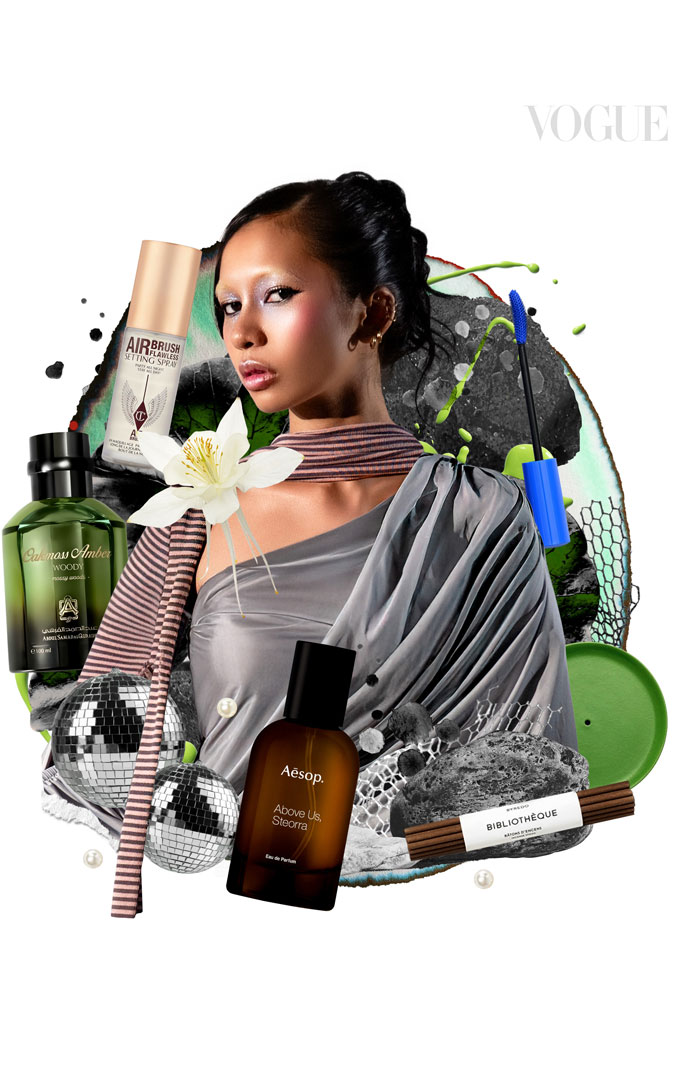
But however flexible the term ‘bridal make-up’ is, there are many unanimous dos and don’ts that you should keep in mind for your big day. Here, Vogue presents your complete guide to wedding day make-up, from fool-proofing your routine, to making it last, not only throughout the ceremony, but until the reception (and all the dancing it requires).
Do: Trial your make-up
That practice makes perfect couldn’t be more true for your bridal look. Make-up artist and entrepreneur Charlotte Tilbury, the wonder woman behind her eponymous brand and the wedding day make-up for supermodels Kate Moss and Miranda Kerr, emphasises the importance of scheduling at least one meet-up with your make-up artist before the actual day. “Meet for a consultation to discuss the look you want to achieve, so you feel confident it will be right on the big day,” she advises.
When you’re in the chair, don’t be afraid to voice your opinions and tell the artist exactly what you’re looking for. If you have sensitive skin, or have products of your own that you’d prefer to use like a tailored foundation shade, bring them along so the artist can use them in the trial run, or apply similar products in their arsenal. As soon as the trial look is done, test it in not only under natural light, but in front of a camera; flash photography can sometimes be unflattering for powders on your skin.
Even if you have chosen not to hire a make-up artist for the day, and are doing your own, it’s still recommended that you run through all the same steps a few days before. Consider inviting some bridesmaids over to offer some feedback, or help you apply the make-up if you need it.
Don’t: Make any last minute changes
As anxiety-inducing as wedding related activities may be, try not to overthink your bridal look or make any rash, last-minute decisions. If you’ve already decided on your make-up, trial and all, try not to do anything too different on the day, like swapping out a tested product, or using a bolder colour when you’ve practiced with a paler one.
“Your wedding day is the time to enhance your natural beauty to feel like the most beautiful, confident version of yourself,” notes Tilbury. “Be careful of experimenting with new and bold colours on your wedding day. For example, specific colours such as purple can suit some—especially brown or green eyes—more than others, whereas neutral shades like chocolate, bronze and copper span all eye colours, never date and suit all complexions.”
Do: Take care of your skin
A perfect look requires a perfect base, and there’s nothing more important for bridal make-up than fresh, healthy skin. In the weeks—or even months—leading up to the ceremony, brides might undergo regular facial treatments to keep their skin in check, or alleviate specific concerns like redness, dryness or excess sebum. If you’re a bride in a sunnier climate, it’s even more important to stay slathered in SPF to prevent burns and the flakiness that will ensue.
Tilbury views skin prep as vital to the final look. “Dewy, glowing skin is perfect for bridal beauty and one of my most requested make-up looks,” she says. Tilbury recommends a double cleanse—an oil cleanser followed by a foaming cleanser—to thoroughly clear the skin of grime and dirt. Those with a fixed skin routine can then apply their preferred serums and moisturisers, but those without can look for hydrating products such as hyaluronic acid that are nourishing for all skin types. After using a primer, Tilbury then applies a foundation. “Starting from the centre of the face, gently buff and blend outwards, only applying where a little extra coverage is needed. I use my fingers a lot because the warmth of your hands helps blend it in.”
If you’re a bride who wants a dewier look for her wedding, follow Tilbury’s advice and opt for a liquid foundation, sheered into the skin with your fingers. Even if you’re in search of fuller coverage, apply your foundation gradually to achieve your desired finish—it’s hard to pare back from being too heavy handed, but you can always layer on more if needed.
Don’t: Forget primer or setting powder
An oft-forgotten step in a make-up routine, primer will be all the more important for making sure your bridal look stays in place throughout the day and night. “Bridal make-up should stay in place all day, from the ceremony to the reception,” says Tilbury, who, along with Amy Conway, senior PRO artist at Bobbi Brown Cosmetics, affirms that using primer guarantees that your make-up will last noticeably longer. Any primer here should do, but if you have oilier skin, you might consider a mattifying, silicon-based product over others.
Of course, your skin prep doesn’t end there, or at foundation and concealer. As obvious as it might seem, setting your make-up with powder is the only way to lock in all that goodness, and put that primer to use. “Keep cheekbones free of powder so that they remain dewy-looking and catch the light,” Tilbury recommends. Use a soft brush, tapping off excess powder before applying it lightly to areas of your face prone to shine, such as your t-zone: across the forehead, and down and around the nose.
Do: Make your eyes and cheeks pop
“With flash photography, it is the definition in our features that we can often lose,” says Conway. To avoid looking washed out in your wedding photos, make sure that you add a little more definition to the central parts of your face, like your eyes and cheeks. Conway recommends darker neutrals for your eyeshadow that will suit every bride and help bring out your natural eye colour. “A beach bronze eye enhances every eye colour and instantly adds a sultry finish to any bridal look,” she says. Don’t be too afraid either of using a touch more mascara than usual, which will make your eyes appear more open.
Conway’s ‘the more the merrier’ advice applies also to blush, which she says can be used with generosity. Conway herself prefers “blue-ish pink tones on the cheek…to instantly brighten the skin,” but those with darker skin tones might consider deep oranges, reds or even berries to create a bright, natural flush.
Don’t: Skip the lip liner
If there’s a peeve those of us who wear make-up are familiar with, it’s that lipstick can go everywhere, smeared on the edge of a glass, the back of a hand, the bodice of a dress. What it costs in stains it leaves behind in unevenly-coloured lips, and even lipstick-coloured teeth. Such a nightmare is to be avoided at all costs for a wedding.
Cue lip liner. “To enhance the longevity of any lipstick, I always use my Lip Cheat lip liner first as a stencil, ensuring lip colour lasts and to create the effect of fuller lips with a flawless finish,” says Tilbury. Not only will lip liner help any lipstick last through your meals, but it will also help define your lip colour by giving it a more precise edge. “Use a lip liner in the same shade as your lip colour to softly define and make your pout pop a little more than usual,” Conway adds.
Do: Use waterproof eyeliner and mascara
Long-lasting products are a must for your wedding day, and eyeliner and mascara are no exception to this rule. With emotions running high, there’ll be plenty of tears. Happy as those tears may be, water does not discriminate, and you’ll need to take precautionary measures to ensure that you won’t cry your make-up directly off your face.
“Long-wear gel eyeliner… doesn’t budge and is really easy to apply,” says Conway. “And waterproof mascara is a must on your wedding day! Layer your waterproof mascara on top to act as a raincoat.”
Don’t: Forget to touch up
No matter how well you’ve primed and set your make-up, it will not be impenetrable to the whims of the weather, or the sweat that will no doubt accumulate throughout the day. Here, leaving for the ceremony without products you can use to touch-up is a big no-no. Conway always recommends that brides store make-up either at the wedding venue, or with her bridesmaids, so that if anything should occur, or should she need freshening up, she can do so in a jiffy.
This is by no means a requirement to bring an entire suitcase of make-up products, just the essentials that you can easily pat on before re-joining the party. Think foundation sticks, concealers, and a lipstick tucked away in a small clutch or left in a back room.
Do: Treat your nails
For leading nail technician Marian Newman, author of Nailed It, a beautiful set of nails is just as important to bridal beauty as make-up. “There is much more interest in ‘the detail’ for brides now,” she says. “By this I mean that from afar, nails should look very delicate and pretty, but when you look closer, there can be small areas of detail: a small design in gold, or the colour of the flower bouquet; a few little crystals; a pretty decal [nail stickers] or even a tiny dried flower under the topcoat. “With the whole bridal look, it is far more chic to make the detail very delicate.”
If you’re looking to apply a nude tone to your nails, Newman has a few tips on choosing the perfect colour. “If you’re not sure which nude is the best for you, spread your thumb and forefinger and look at the triangle of skin there; this has no underlying veins nor redness seen on most hands,” she clarifies. “Try to match this area of skin as closely as possible.”